RE: Part request: 3757 - Minifigure, Weapon Crescent Blade
2025-06-25, 11:51 (This post was last modified: 2025-06-25, 12:06 by Vincent Messenet.)
2025-06-25, 11:51 (This post was last modified: 2025-06-25, 12:06 by Vincent Messenet.)
I'm on Mac and to add custom parts to Studio you have to go to the folder
/Users/[YOUR USER NAME]/.local/share/Stud.io/CustomParts
If CustomParts folder does not exist yet create it and then a subfolder named parts
Extract the downloaded zip file and put the extracted files in the parts folder like this
 CustomParts_folder.png (Size: 34.34 KB / Downloads: 61)
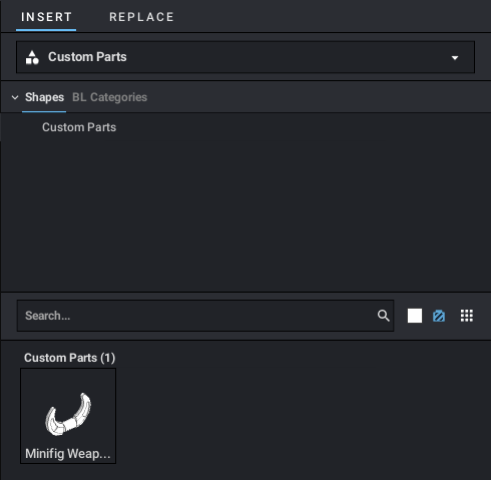
Launch Studio and you should see a new building palette, select Custom Parts instead of Main
Now you should find the 3757 part

Doing that way the part will have no connectivity info and you will have to place it manually using the Move tool.
If you want to add connectivity to the part you don't need to follow what I described above but you will need to import the part using PartDesigner program available here
https://www.bricklink.com/v3/studio/partdesigner.page
Once downloaded and installed launch it and then click on Import then Choose a file...
Browse to the unziped 3757.zip, select 3757.dat file and click on Insert
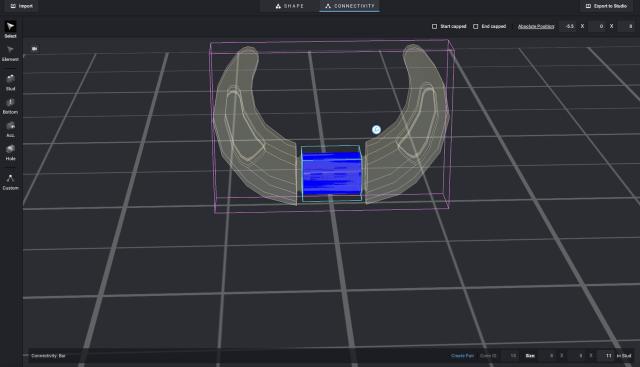
The part should be visible, then switch to the Connectivity tab, select the Accessory connectivity category and the bar connectivity, adjust the bar appropriately (define the correct length and position). Then you should have something like this:

Switch back to the Shape tab, select the part and click on Export to Studio
Leave the Part name field as is and put 3757 in the two other fields, click on Export
Launch Studio and you should see a new building palette, select Custom Parts instead of Main
Now you should find the 3757 part with appropriate connectivity to minifig hands or to any other part having a clip.

/Users/[YOUR USER NAME]/.local/share/Stud.io/CustomParts
If CustomParts folder does not exist yet create it and then a subfolder named parts
Extract the downloaded zip file and put the extracted files in the parts folder like this
 CustomParts_folder.png (Size: 34.34 KB / Downloads: 61)
Launch Studio and you should see a new building palette, select Custom Parts instead of Main
Now you should find the 3757 part
Doing that way the part will have no connectivity info and you will have to place it manually using the Move tool.
If you want to add connectivity to the part you don't need to follow what I described above but you will need to import the part using PartDesigner program available here
https://www.bricklink.com/v3/studio/partdesigner.page
Once downloaded and installed launch it and then click on Import then Choose a file...
Browse to the unziped 3757.zip, select 3757.dat file and click on Insert
The part should be visible, then switch to the Connectivity tab, select the Accessory connectivity category and the bar connectivity, adjust the bar appropriately (define the correct length and position). Then you should have something like this:
Switch back to the Shape tab, select the part and click on Export to Studio
Leave the Part name field as is and put 3757 in the two other fields, click on Export
Launch Studio and you should see a new building palette, select Custom Parts instead of Main
Now you should find the 3757 part with appropriate connectivity to minifig hands or to any other part having a clip.


